

I pulled a wire bristle out of a burger once. Sat right there on the patty, shining in the afternoon sun like a tiny piece of evidence against my whole cleaning routine. I had been using wire grill brushes for probably fifteen years at that point, same as every other backyard cook I knew. You go to the hardware store, grab the cheapest brush on the hook, figure it does the job. That moment changed how I think about grate cleaning entirely. The problem is not that you were being careless. The problem is that wire bristles shed, and once they shed they go somewhere, and that somewhere is sometimes your food. The FDA and a handful of emergency room reports have been saying this for years. Most backyard cooks just never had the moment where it became personal.
Switching away from wire does not mean accepting a worse clean. I have tested just about every bristle-free option on the market over the last three summers, and the one I keep reaching for is the Kona Safe/Clean Grill Brush. It is a coiled stainless steel design with no loose fibers to shed, it fits every grate type I cook on, and it outlasts a wire brush by two or three seasons. More importantly, it gets the grates genuinely clean without any guesswork about what ended up in the food. In this guide I am going to walk you through the exact five-step method I use before every cook, including the heat-and-scrape timing that most people get wrong and the oiling step that keeps grates clean longer between sessions.
Your grill brush is shedding bristles and you probably do not know it yet
The Kona bristle-free grill brush cleans cast iron, porcelain, and stainless grates without a single wire to worry about. Over 13,000 backyard cooks have already made the switch. Check today's price before your next cookout.
Amazon Check Today's Price on Amazon →Step 1: Heat the Grates Before You Touch Them
This is the single most skipped step in backyard grill cleaning and it makes a bigger difference than the brush itself. Fire your grill up to high, close the lid, and let it run for ten to fifteen minutes before you start scrubbing. What you are doing is burning off the loose carbon, proteins, and grease from your last cook so they turn to ash instead of glue. Cold grates make cleanup two or three times harder because everything that cooked onto the bars is still semi-sticky and semi-flexible. Hot grates give you a surface where the residue has dried and cracked and wants to come off.
On a gas grill I crank all burners to high for twelve minutes. On a charcoal setup I wait until the coals are fully ashed over and the grates are glowing slightly from the radiant heat underneath. Cast iron grates need the full fifteen minutes because they hold more oil and residue than stainless. Porcelain-coated grates are more fragile, so do not go nuclear on heat. Five hundred degrees Fahrenheit is plenty for porcelain. The goal is not to incinerate everything, just to get the residue dry and brittle so the brush can knock it loose in one pass.
Step 2: The First Scrape Pass While Grates Are Still Hot
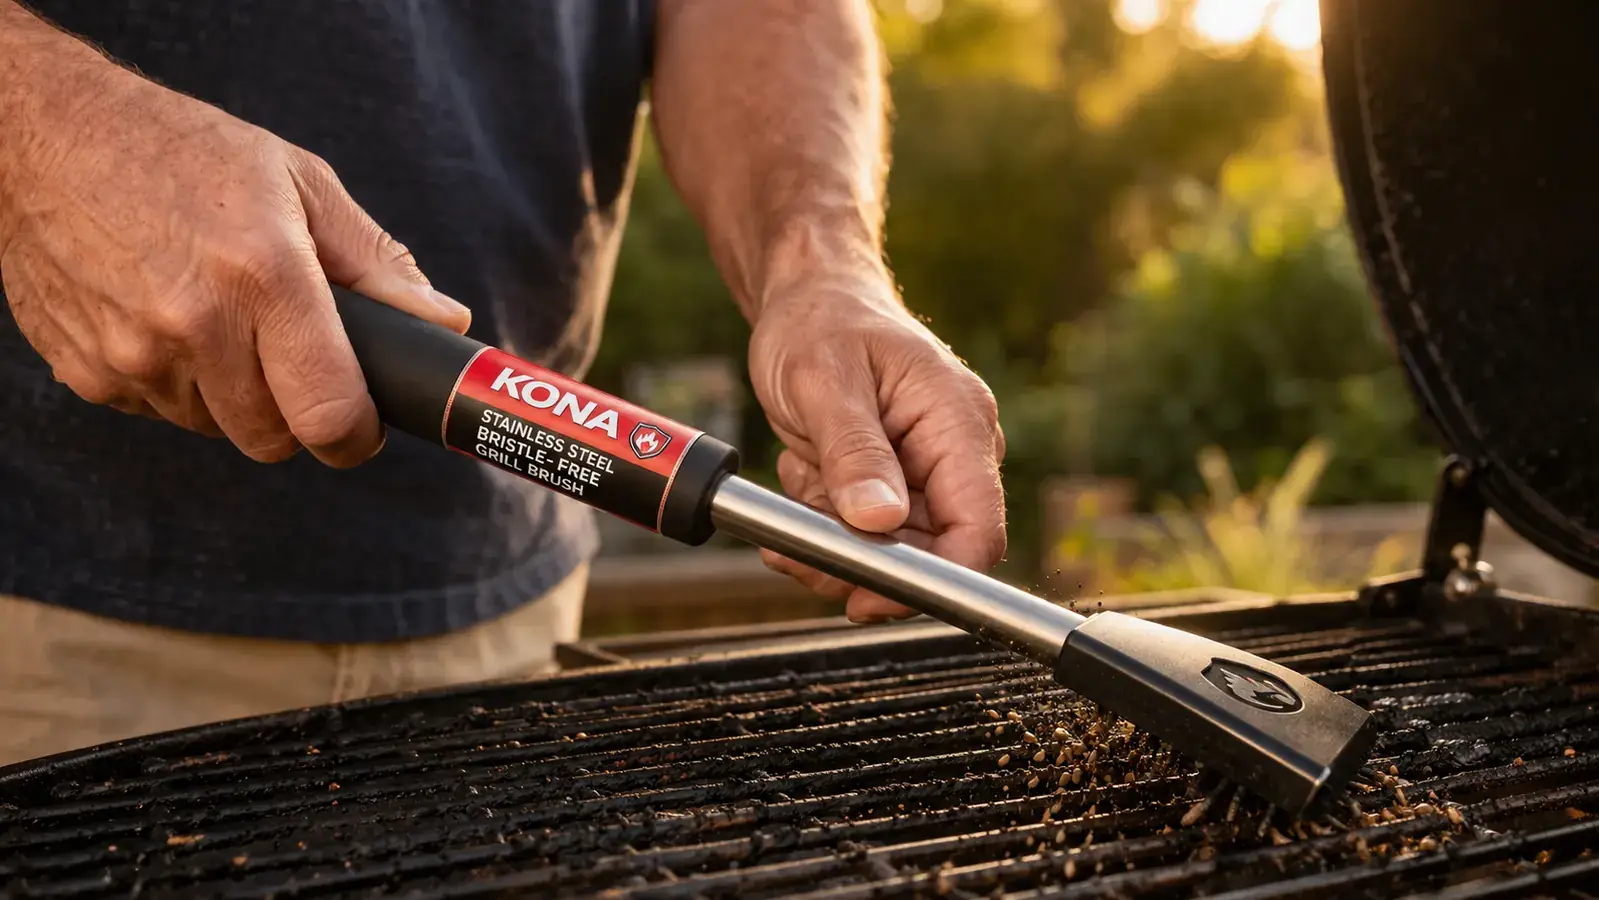
This is where the Kona brush earns its money. Right after you open the lid on a hot grill, you have about a three-minute window where the grates are at peak temperature and the residue is at its most brittle. Grip the handle firmly, angle the brush head so the coiled steel contacts the grate bars flat rather than at a corner, and push forward with steady medium pressure. Do not try to dig the brush in. You are sweeping, not gouging. One long stroke down each pair of bars is enough. Flip the brush 180 degrees and do a return pass. Most of the heavy carbon will come off in these two passes.
On cast iron grates, I work section by section. The grates on my old Weber Spirit run in four rows of about six bars each. I clean one row completely before moving to the next so I do not lose track of where I have been. On porcelain-coated grates, use lighter pressure. The coiled steel design is gentle enough that it will not crack the coating the way wire bristles can, but pressing hard into a chip or existing crack in the porcelain will widen it. If you see a chip, clean around it rather than through it. The Kona handles porcelain better than any wire brush I have used, but it still rewards a little awareness.
After your first two passes, let the ash and carbon debris fall through the grates onto the drip pan or charcoal tray below. No need to wipe anything mid-process. A well-made bristle-free brush like the Kona drops the debris downward rather than flinging it sideways, which keeps it out of your face and off the burner covers. This is one of those small design details that only shows up in actual use.
Step 3: The Kona Brush Detail Pass
Once the big carbon is off, I do a slower second pass with the Kona focused on the corners and the undersides of the grate bars. Grease and smoke residue collect on the bottom edge of each bar, and a single straight-down scrape misses it. Tilt the handle slightly toward you so the edge of the coiled head reaches the lower face of the grate bars. Move slowly on this pass. You are feeling for sticky spots rather than scraping aggressively. If you hit resistance, pause, apply a little more downward pressure, and then push through. Do not saw back and forth rapidly. On a good brush like the Kona, that kind of motion does not increase cleaning power but it does wear the brush head faster.
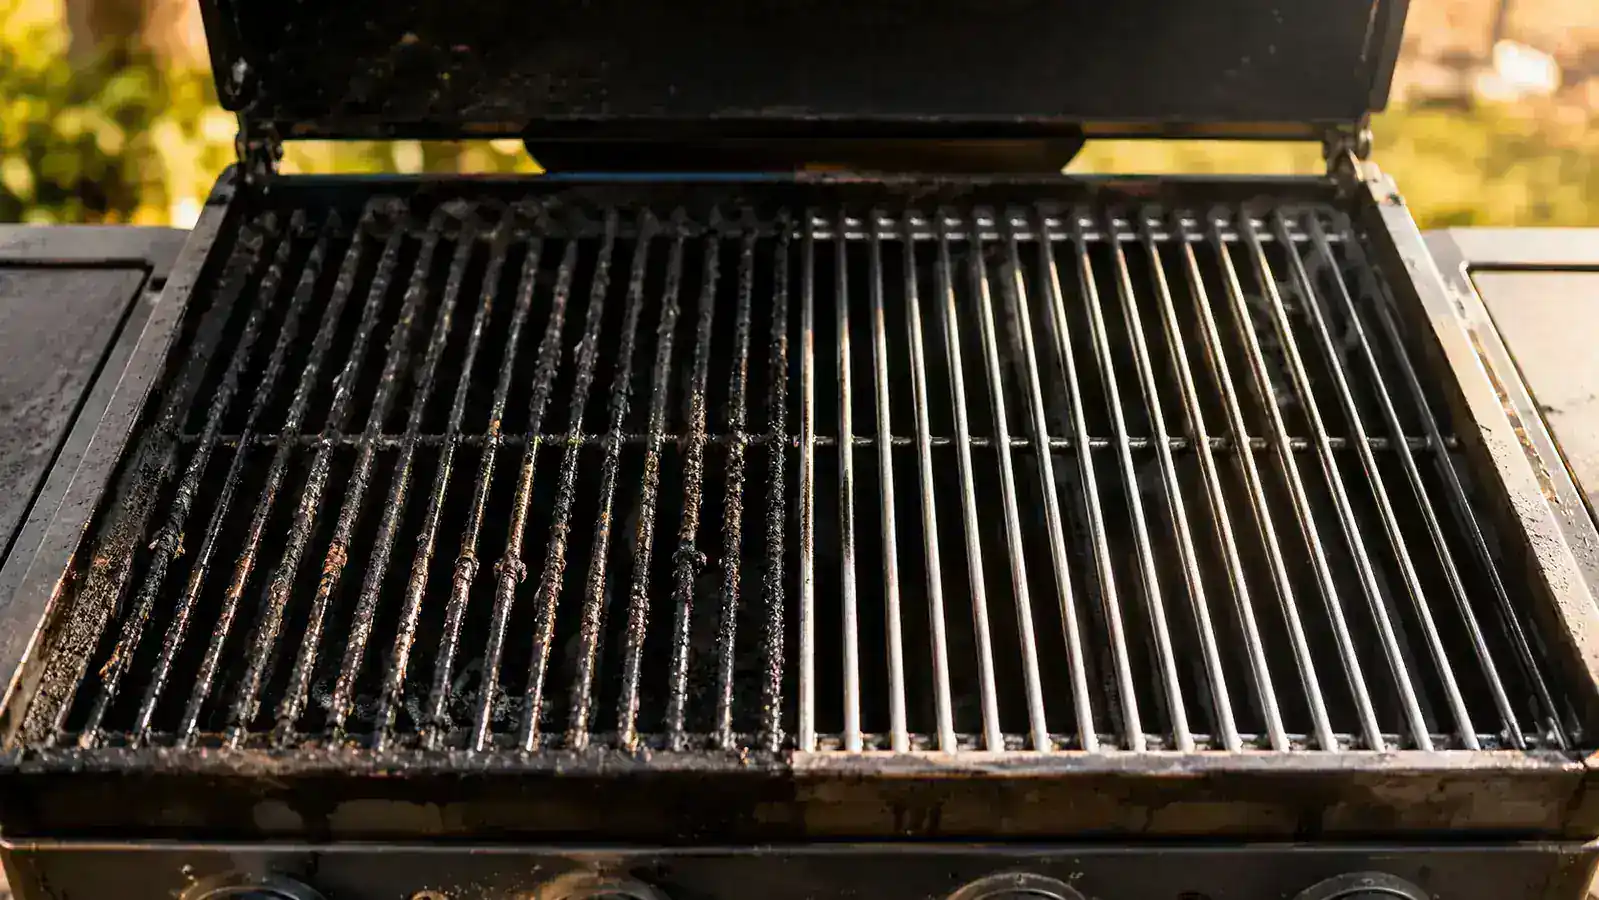
The Kona Safe/Clean Grill Brush has a wider head than most budget bristle-free options, which means your detail pass covers more bar surface per stroke. That extra width matters on a full-size grill where you might have thirty or forty bars to work through. It also means the brush does not tip sideways as easily when you are working at an angle, which is a small thing that becomes a big thing after a couple hundred grilling sessions. After the detail pass, the grates should look uniformly gray-black with no visible grease patches. If there is a sticky spot that is not releasing, that is usually a sign the grates did not get quite hot enough. Bump the heat up for two more minutes and come back.
Once I stopped using wire brushes, I stopped wondering whether what I pulled off the grates was debris or part of the brush itself. That peace of mind is worth more than any price difference.
Step 4: Season and Oil the Grates After Cleaning
Oiling your grates after cleaning is something I skipped for a long time and I paid for it in extra cleanup work the following week. A thin coat of high-smoke-point oil applied right after brushing protects the grate surface from oxidation between cooks, fills in micro-pores in the metal so food releases better, and keeps the surface seasoned the same way a cast iron pan stays seasoned in your kitchen. Fold a half sheet of paper towel, grip it with long-handled tongs, dip it in grapeseed or canola oil, and wipe it down every grate bar from front to back. You want barely there oil, not a visible coat. If the oil is dripping, you used too much.
For cast iron grates specifically, this step is not optional. Cast iron will rust within a single rain cycle if left bare and hot, then cooled with moisture in the air. The oil layer is your protection. For stainless grates, it is more of a nice-to-have, but it still reduces the amount of protein that sticks during your next cook. For porcelain, use very little oil and keep it on the cooking surface only. Oiling the underside of porcelain grates can accelerate rust on the base metal beneath the coating if the porcelain has any micro-cracks. After you oil everything, close the lid for two minutes and let the oil polymerize slightly on the hot grates. Then you are done.
Step 5: Final Inspection and Brush Maintenance
Before you put food on, take thirty seconds to run your eye across every grate bar. You are looking for any visible food debris you missed, any spot where the oil coat looks uneven, and the condition of your brush head. Turn the Kona brush over and look at the coiled steel. A well-maintained bristle-free brush should show flattening and some discoloration over time, but no loose coils, no separated wire ends, and no sections where the coil has opened up. If you see a loose end starting to peel away from the coil body, that is a sign the brush has had a full life and needs replacing. On average I get two solid grilling seasons out of a Kona, which is about the same price-per-season as a mid-range wire brush but without any of the contamination risk.
After the cook, do a quick hot scrape while the grates are still warm. Residue is pliable right after you pull the food off, and a single pass of the Kona while the grill is still at temperature clears about eighty percent of what would otherwise bake on overnight. The more diligent you are about post-cook cleans, the shorter your pre-cook cleaning becomes over time.
What Else Helps
The brush method is the core, but a few supporting habits will make a real difference in how your grates perform season after season. First, always preheat with the lid closed. An open-lid preheat loses too much heat from the grate bars and you never hit the temperature you need for that first scrape pass to work properly. Second, if you are dealing with a grate that has months or years of neglect baked onto it, consider a deep clean before you start the weekly routine. Take the grates off the grill, lay them in a trash bag with a half cup of ammonia, seal the bag, and leave it outside overnight. The fumes loosen carbonized grease that no brush can remove mechanically. Then scrub with the Kona the next morning and rinse well. This is a once-a-season reset, not a weekly habit.
Second, think about what you cook and when you clean. High-sugar marinades and sauces are the hardest things to clean off grates because the sugars caramelize at high heat and turn into something closer to varnish than food. If you are cooking sauced ribs or glazed chicken, plan to do your hot scrape immediately after the cook rather than letting the grill cool. Sugar residue that sits on grates overnight comes off in sheets or not at all. Third, match your brush technique to your grate material. Cast iron takes the most aggressive approach and benefits from the most oil. Stainless is forgiving. Porcelain needs a light touch. Most grills have one type throughout, but if you have ever replaced individual grates with a different material, make sure you know what you are working with before you crank the heat to maximum.
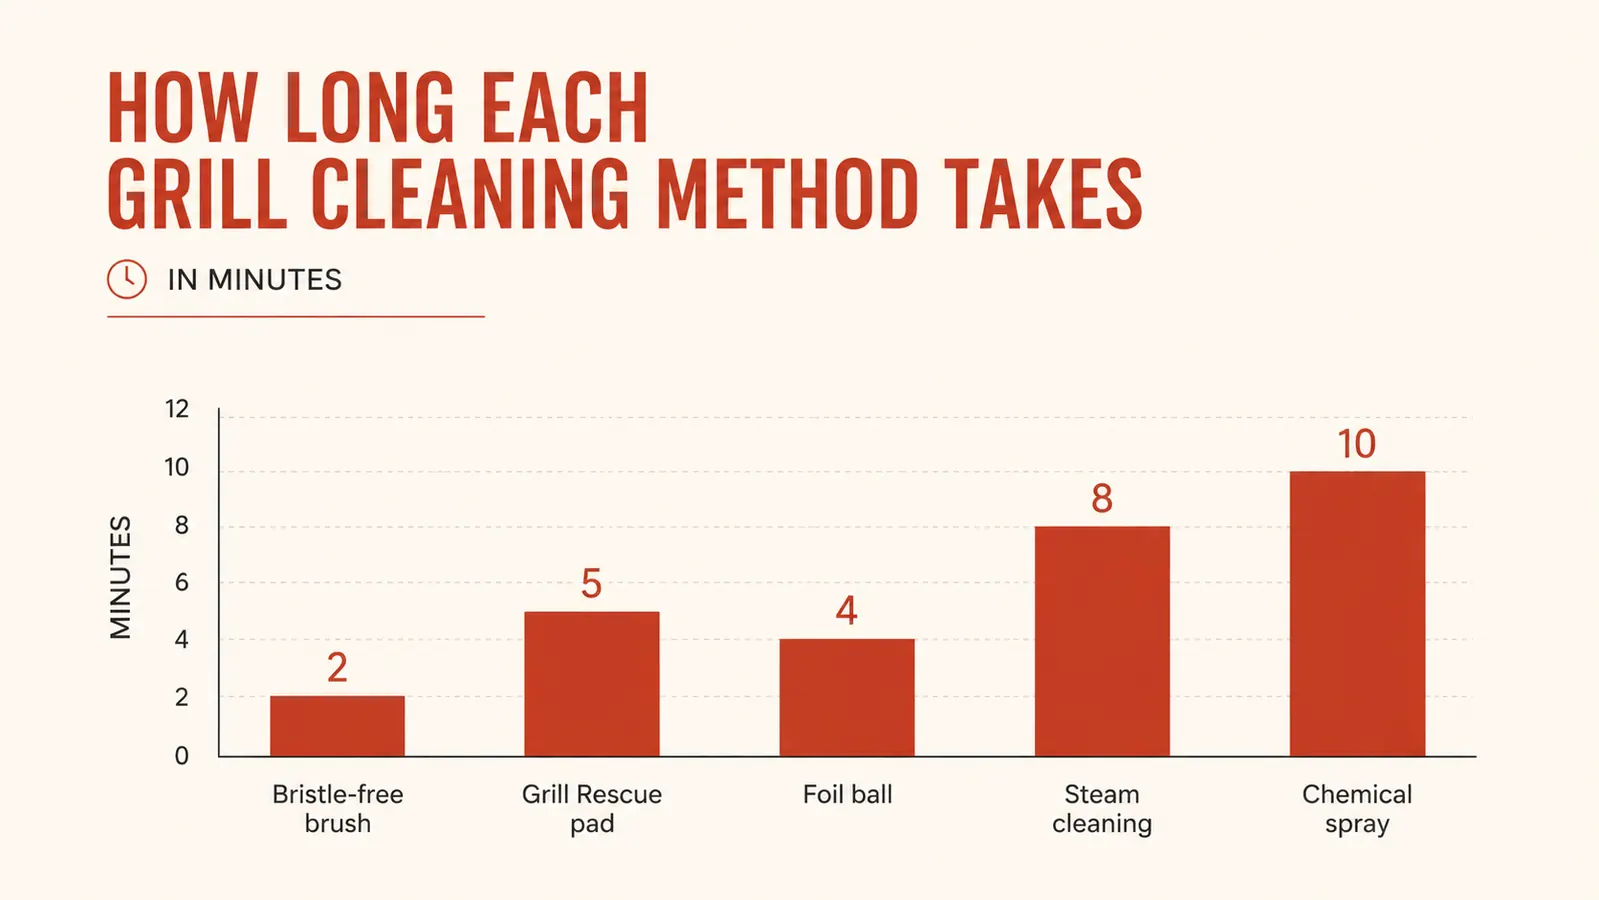
If you want to read more about how the Kona brush holds up over a full two-year run on all three grate types, including the one situation where it struggles, check out my full long-term review. And if you are deciding between the Kona and the Grill Rescue steam-cleaning brush, that comparison covers the exact tradeoffs in cleaning power, price, and durability so you can choose the right tool for your setup.
The biggest thing I want you to take away from this guide is that safe grate cleaning and effective grate cleaning are not a tradeoff. The reason most people stick with wire brushes is that they assume bristle-free options are weaker or harder to use. In my experience, the opposite is true. The Kona cleans faster, lasts longer, and I never pick anything out of my food afterward. That alone makes it worth it.
Ready to clean your grates without wondering what ended up in the food?
The Kona Safe/Clean Grill Brush is the bristle-free option over 13,000 backyard cooks trust for cast iron, porcelain, and stainless grates. Built in rust-resistant stainless steel with a head wide enough to cover a full-size grill in one pass. Check today's price and make the switch before your next cookout.
Amazon Check Today's Price on Amazon →